Readiris Dyslexic 2.0 does not include its own text-to-speech voice. It means it will use text-to-speech voices that are installed on your Windows computer. If you need help to add a text-to-speech voice to your computer, IRIS invites you to follow this guide.
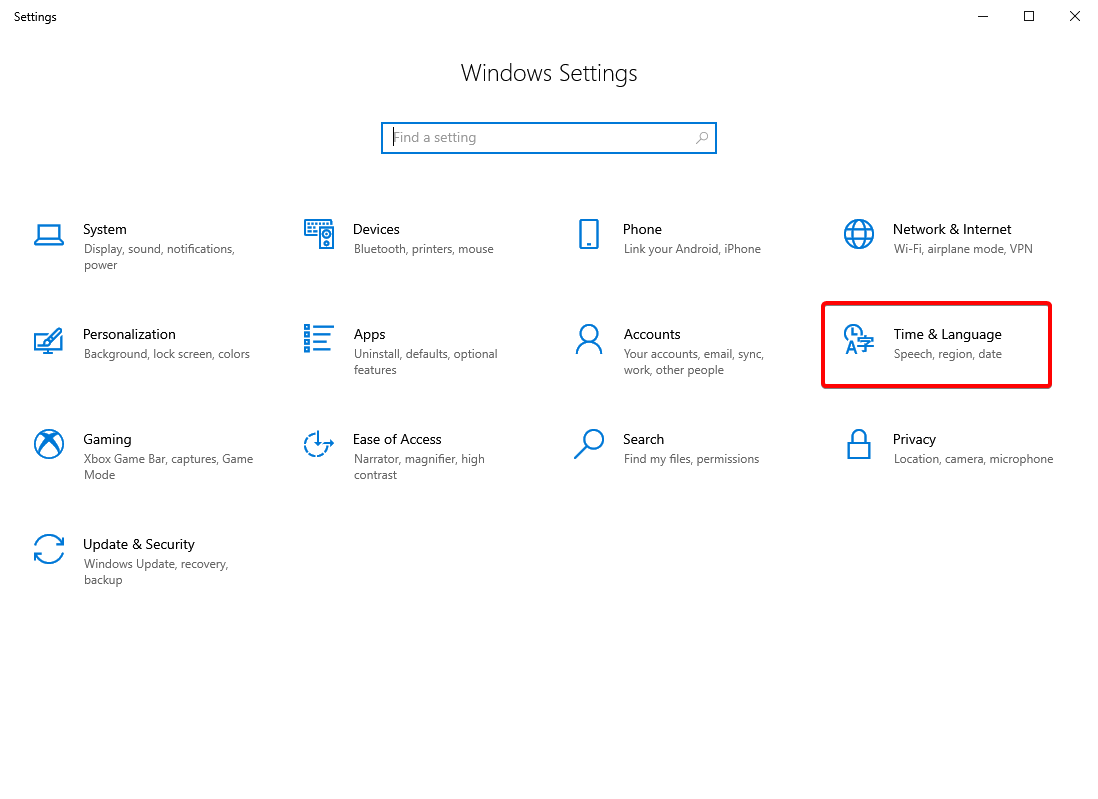
- Open the Windows Settings app by clicking on the Start menu and selecting "Settings" (the gear icon).
- In the Settings app, click on the "Time & Language" option.
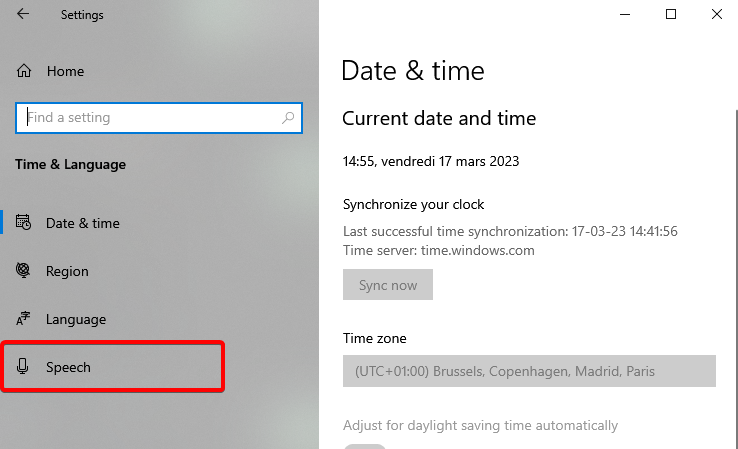
- Select "Speech" from the left-hand menu.
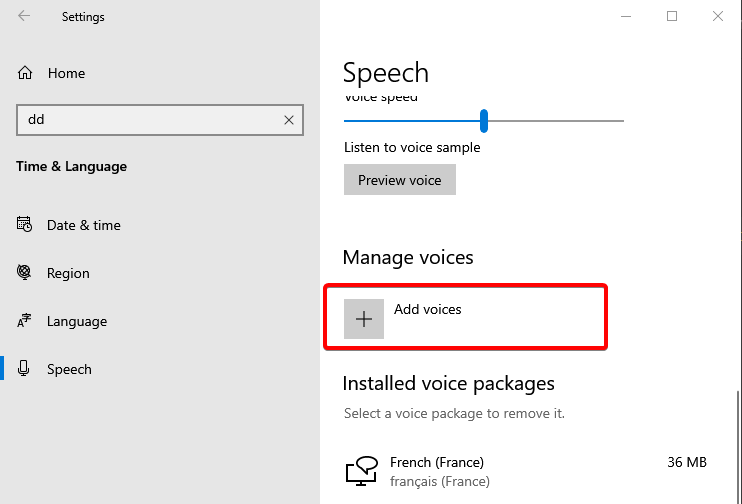
- Under the "Manage voices" section, click on the "Add voices" button.
- Find and select the language that you want to add a Text-To-Speech (TTS) voice for. You can search for the language in the search bar or browse through the list of available languages.
- Once you have selected the language, you will see a list of available TTS voices. Click on the voice that you want to add.
- Windows will download and install the selected TTS voice. This may take a few minutes depending on the size of the voice file and your internet connection.
- Once the TTS voice is installed, you can test it by clicking on the "Preview voice" button next to the voice name. You should hear a sample of the voice reading some text.
- Now restart Readiris Dyslexic 2.0. You should now see the voice you just downloaded in the "Voice" list:

That's it! You should now be able to use the new TTS voice. Repeat these steps for any additional languages or TTS voices that you want to add.


Baptiste Roy
Comments